 |
03/28/07 cont.
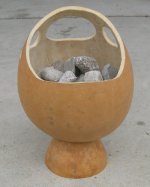
Last night I glued the base to the bowl using wood clue, and held it by filling it with rocks for weight. So far
I've never had a gourd come apart with wood glue as long as it is weighted or clamped well.
|
|
|
|

|
03/29
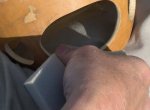
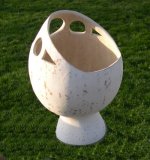
early afternoon, the rocks are removed, the joint is set. You'll notice the base piece is farly closely matched to
the shape and contour of the bowl. I do this by matching it as close as possible, then I hold it inplace where I want it
and make a verticle mark on the bowl and the base with a pencil so I know where to place it each time I sand it. I see
where the gaps are, then I mark close to the gourd where it actually touches. Then using my dremmel with a sanding disk I
carefully remove a little of the base where the marks are. Do just a little at a time, it is too easy to take off more than
you realize.
|
|
|
|

|
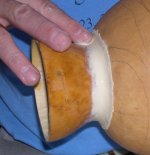
Next step is to smooth out the joint of the two pieces. I'm using non toxic wood putty to fill the joint with a curve the
shape of my finger. This will give a nice slooth transition from the base to the bowl and it will also cover any imperfections
in the joint where the two gourd pieces come together. |
|
|
|
|
As soon as I have it all the way around and is still plyable and wet, I use water on my finger to smooth it out. I use
ample water as this smooths the putty. When finished I hold it upright so any excess water can run away from the wood putty and
it can carefully be dried off being careful not to touch the wet putty with the tissue or paper towel. |
|
|
|

|
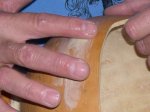
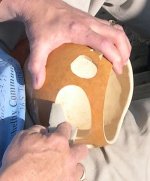
This image and the next I am Filling bug holes & other inclusions, the same way as above. |
|
|
|
|
Once this process is finished and the gourd gets lightly sanded, you will not feel the bug bite holes in the gourd. If the
gourd has any small pimples or warts, they can be sanded with the dremmel to below surface, and filled the same way. |
|
|
|
|
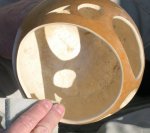
Sanding all of the cut edges including the inside of the holes and around the top to remove any saw marks and to smooth out the
opening as well as round it out a little bit. |
|
|
|
|
|
|
|
|
|
Not shown in these pictures, I also sanded the surface of the gourd. This will lighten just a little the shade of the
gourd, (not to a significant degree), but this will also flatten some of the lesser dimples and prep the surface for adhesion. |
|
|
|
|
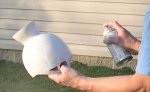
Putting a coat of Gesso over the gourd. Spray on Gesso is thin, but you can cover the same area with an additional layer
every 30 seconds. I've learned that it is easier to spray several thin coats by just taking my time and covering the entire
goard, which requires more than 30 seconds, so I just keep spraying until the gourd is solid white, then I set it aside to dry for an
hour or so, (when the tackiness is gone and it feels dry). |
|
|
|
|
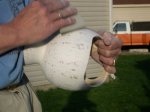
This is a trick a friend of mine who did body work showed me. Spay a layer of paint, then sand it. On a car they
use block sanders, I'm using a sponge sander. Don't sand hard because the idea is to to remove the gesso from the hills and
allow it to partially fill some of the valleys, if you press too hard you will force the sandpaper into the valleys which you
don't want to do. This will be repeated as many times as required to give the final surface I'm looking for.
Something about Gesso and Acrylics that are not similar to car paint is acrylics are rubbery. If you sand too hard or
too fast, you run the risk of softening and peeling the Gesso back. Presanding the gourd, and sanding softer and lighter
will reduce this risk.
|
|
|
|
|
Once you start seeing the gourd being exposed, don't keep sanding that spot, your not trying to flatten the bumps. I've
spent days in the past on some gourds, applying layer after layer to try to end up with a round gourd without all the hills and
valleys. This is not my goal this time, and I don't believe it will be necessary to accomplish this. Gourds
naturially have hills and valleys, but by doing several coats this way, you will eliminate the orange peel look, and have a nice
glassy smooth finish.
If you are going to use color pencil or color inks, you will want to do a finish spray to cover the grain created by the sand
paper. Your last sanding should be with automotive finish paper, if possible, work your way down to 2000 grit or
finer. The final spray if I get it smooth won't need the additional sanding.
|
|
|
|
Gesso accomplishes a lot. It makes a nice toothy surface to hold color pencil like prisma color, it also adheres to
acrylic paints better also. Being white the colors stand out a lot more, especially with pencils like Prismacolor
pencils.
I used the last of my spray Gesso, and can only hope that our local walmart has some tomorrow. Tomorrow will probably be a day
of gesso and sandpaper.
Nope, Walmart quit carrying it, just like they eliminated Pthalo blue paints in any brand, so the project is on hold until we
can get some via the internet...
|

